Creating your first component using Vue 3 Composition API.
December 23, 2022
3 minutes
Run the command
npm create vite@latestin your directory for projects.Follow the prompts, type your project name and select
VueandTypescript.cd <project name>npm installnpm install sass(this is so we can use the SCSS preprocessor)npm run dev
And we’re ready to go!
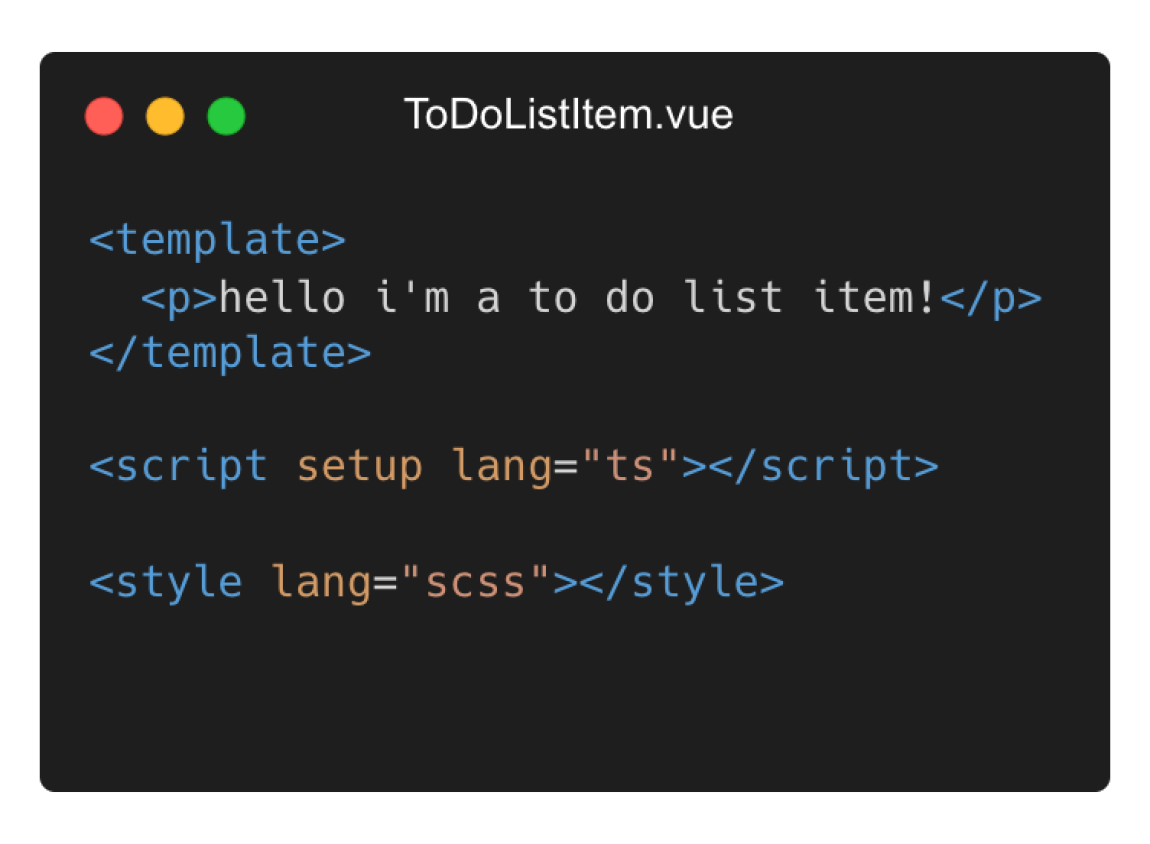
First thing we’ll need to do is create a new Vue file, so within src/components let’s create a file named ToDoListItem.vue and populate it with our basic SFC (single file component) sections:
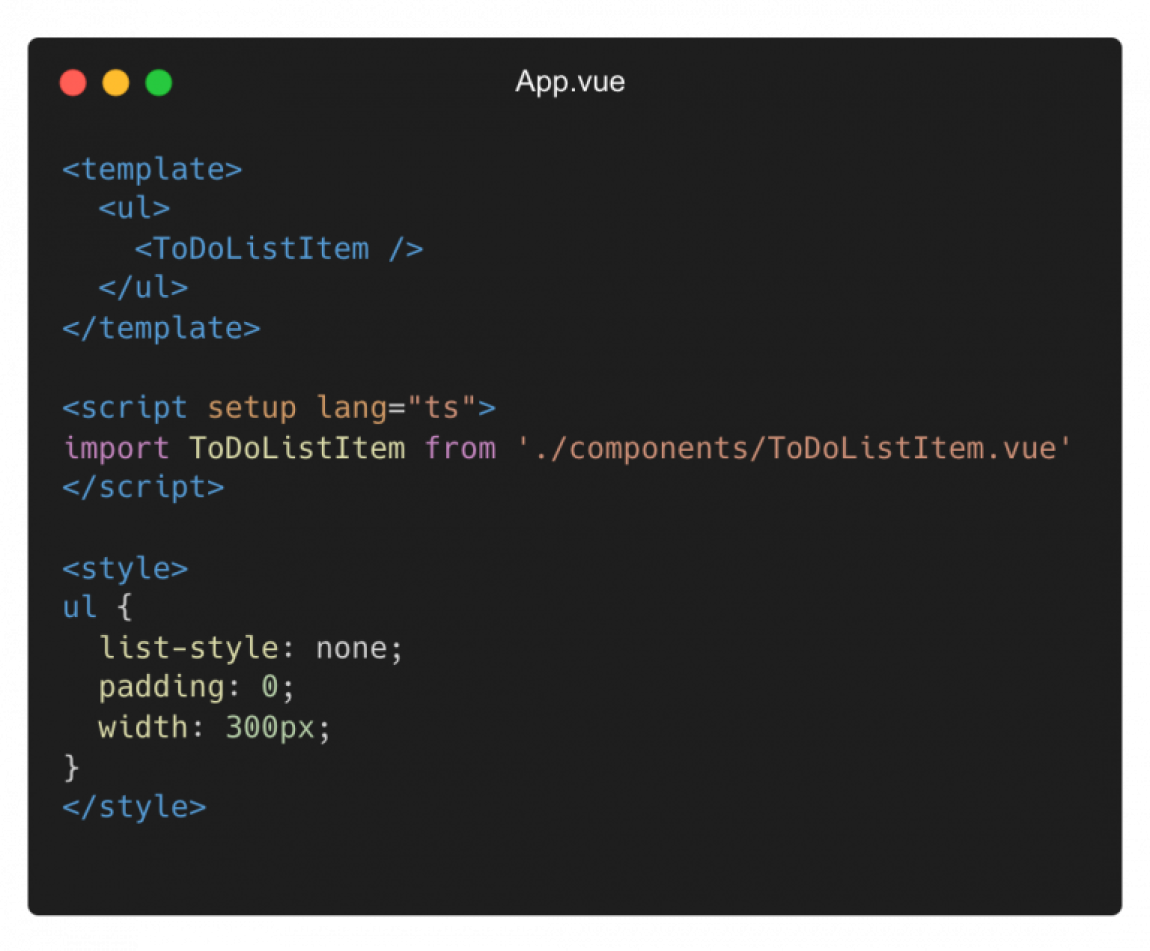
Don’t forget to import it in your App.vue so you can view your changes! Using the script setup syntax, all we need to do is import the component and it is readily available to use in our template.
Our component is going to require icons, for this project I’m going to create some components for each icon and paste the SVG markup within a component, these will be defined in src/components/icons.

After we’ve set up our icons, we need to build a basic checkbox, label for a name and a delete button at the end.
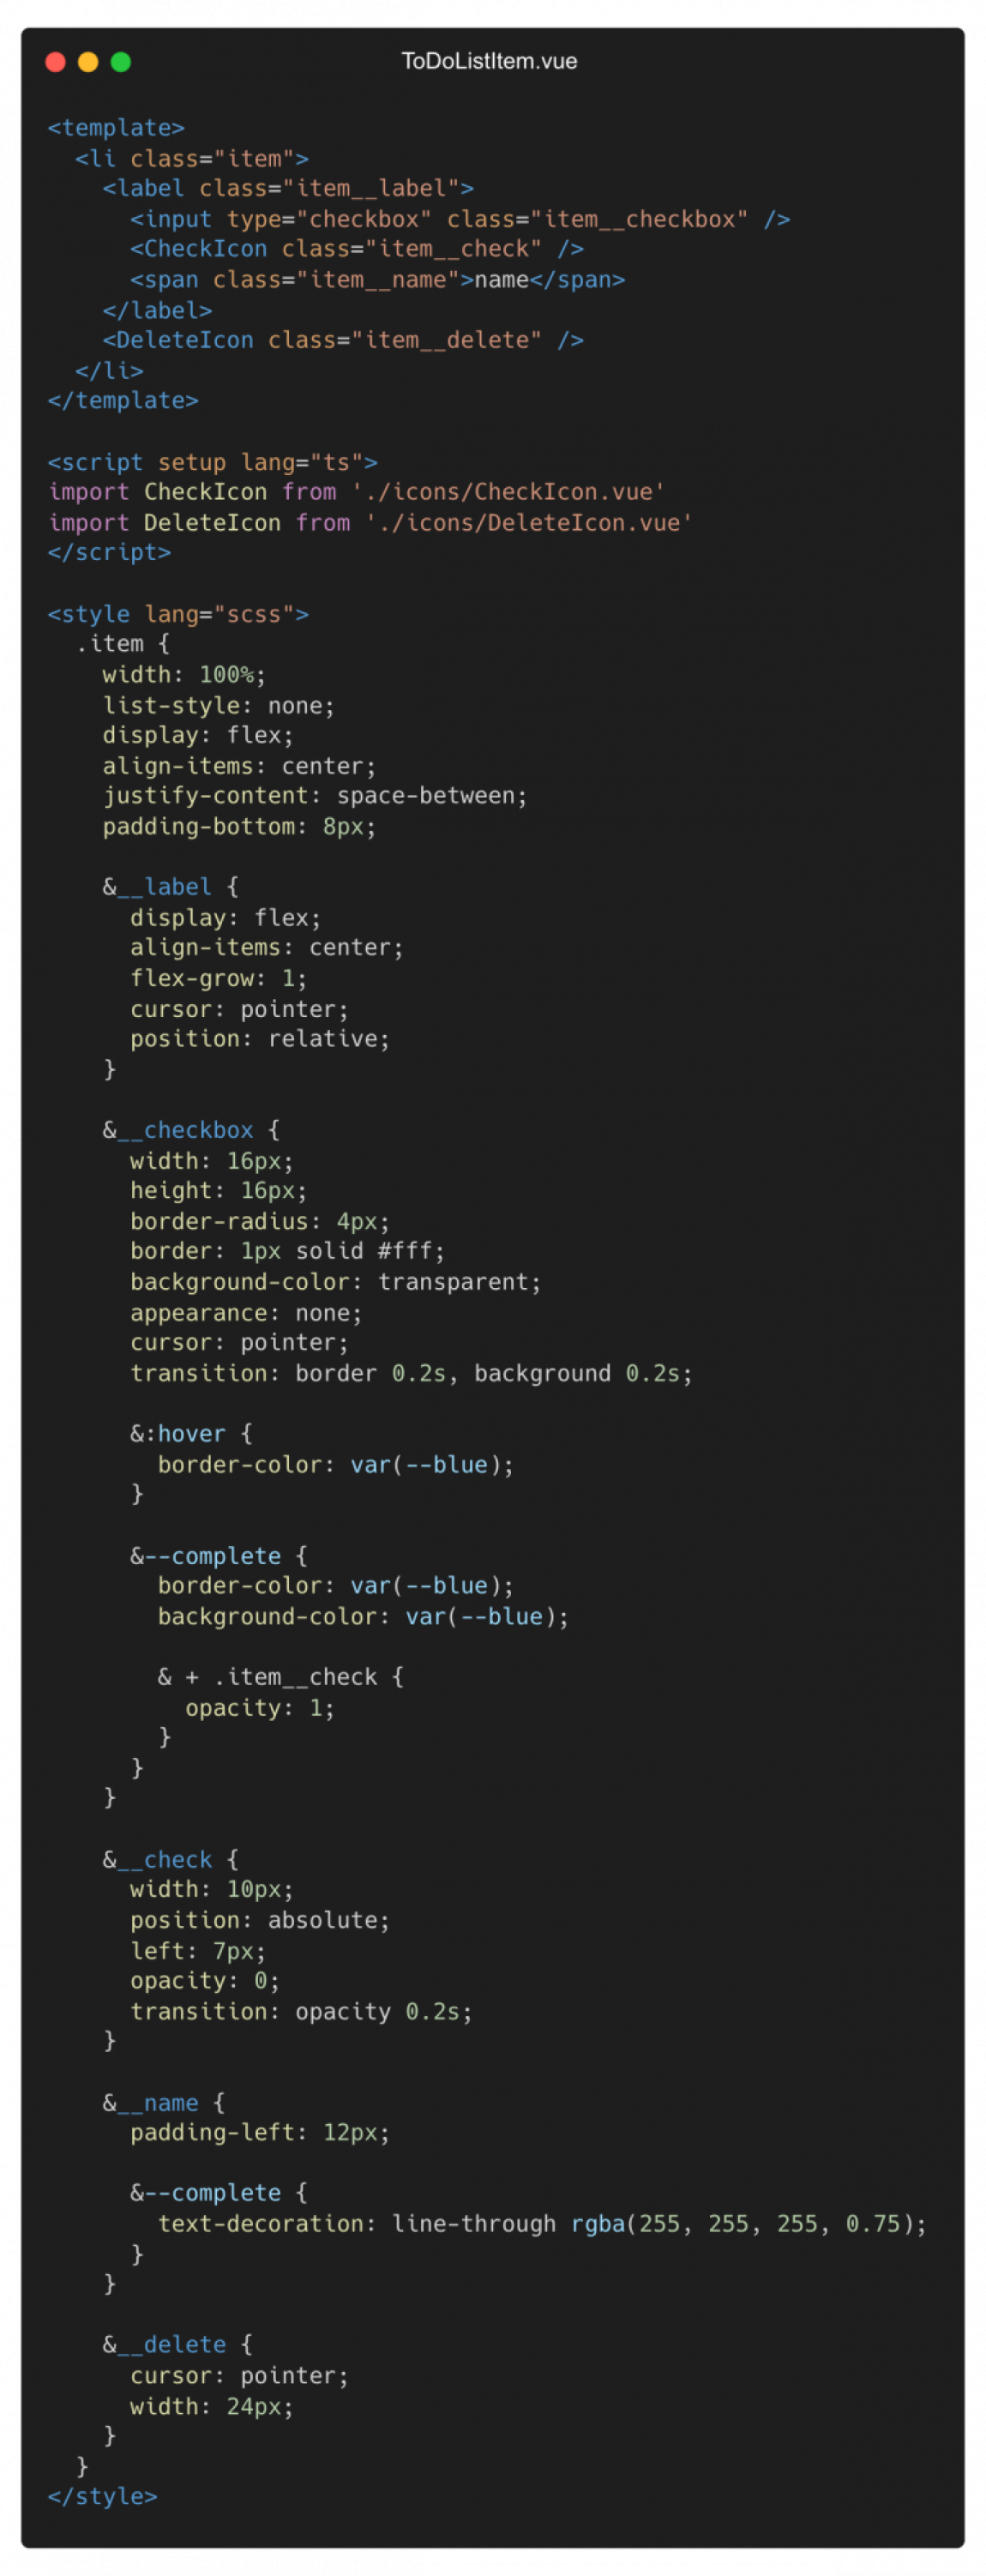
With the aesthetics covered, let’s get to the Javascript! In this component we need to be able to keep track of the checked boolean state of the input, and we will also need to emit a custom event whenever the item has been checked/unchecked.
We will be using ref from Vue’s reactivity API, with this we can set a default value (false) and update it whenever we check or uncheck the checkbox. We will also need a function to handle the change event that we will hook into, on the input element.
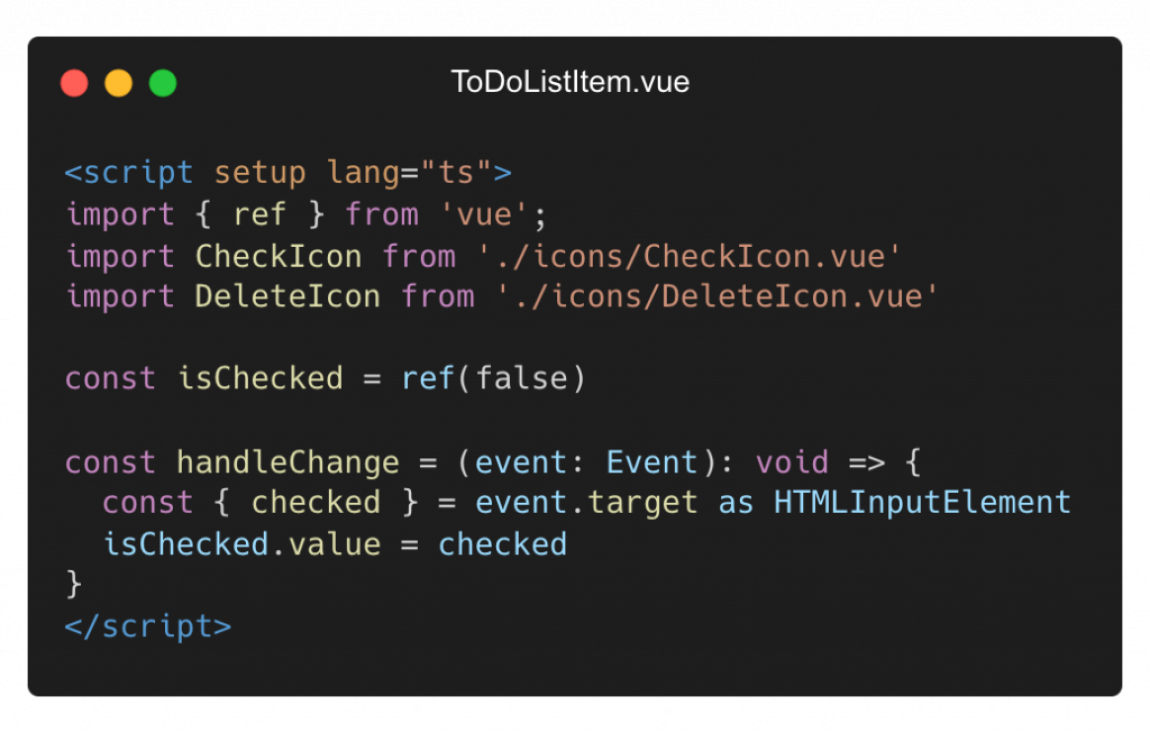
This will expose our isChecked and handleChange variables so we can use them straight away in our template section.
The ref API will allow us to store and update a primitive value, in this case we’re handling a boolean. To update this variable, all we have to do is access value and re-assign, e.g. isChecked.value = true.
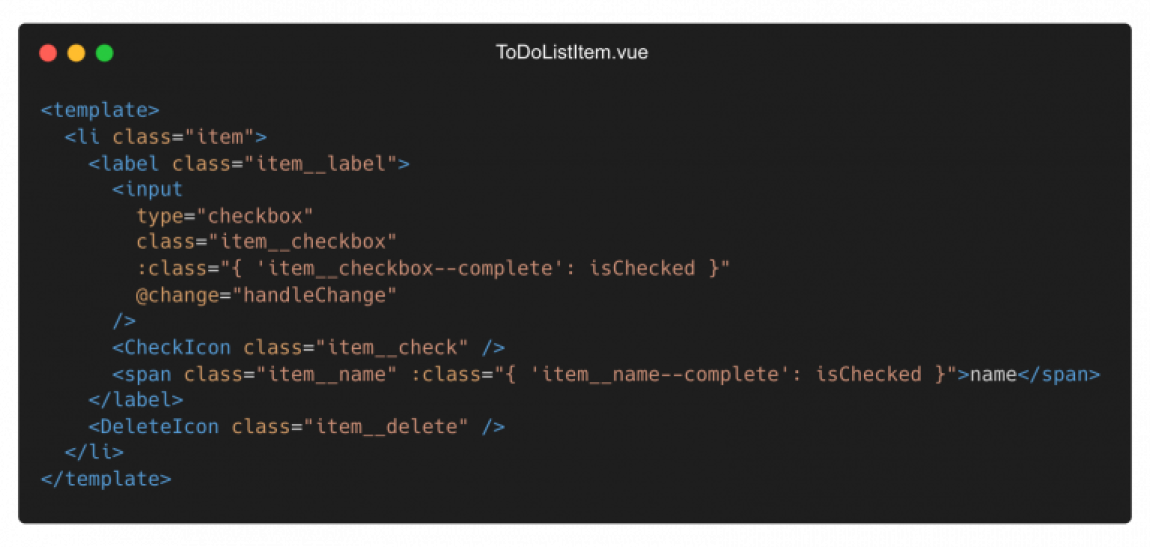
Here you can see we have bound two classes using the isChecked boolean, one on .item__checkbox and one on .item__name. We also access the change event on the input and assign handleChange as its event handler.
Summarised: any time the input changes, it will fire handleChange which stores if it’s checked or not, then binds the classes if isChecked equals true.

Now that our component can be interacted with, we need to emit our custom event with isChecked as the payload. We will use defineEmits to decide what events can be emitted from this component – we will use the Typescript syntax for this as shown below:
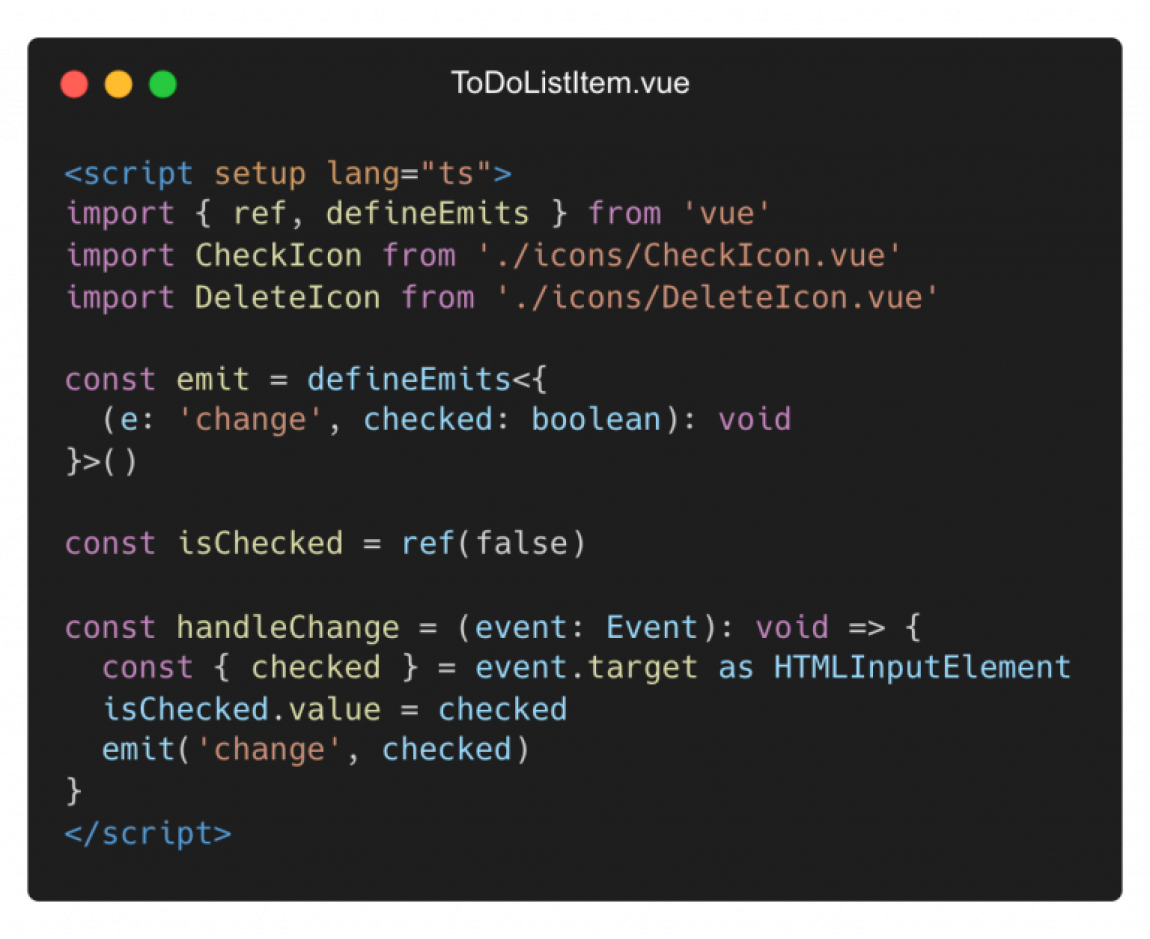
The interface passed to defineEmits lets us define a function that can receive parameters: e which is the name of the event we’re defining as a string; and the payload which we name and provide a type for. Don’t forget to call emit in handleChange with the name of the event and its payload.
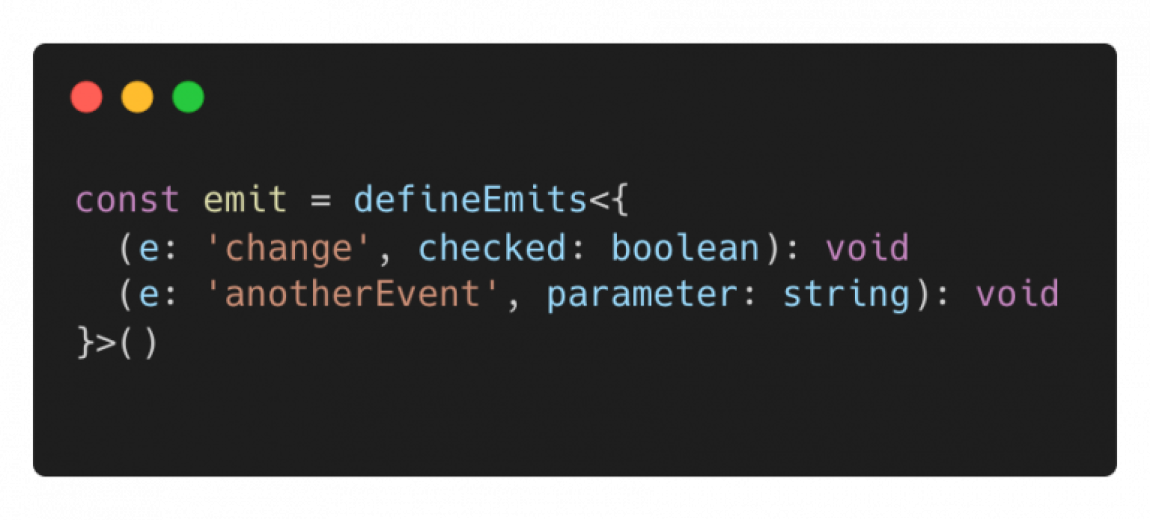
To add another event, you can simply do the same on the line below, e.g.
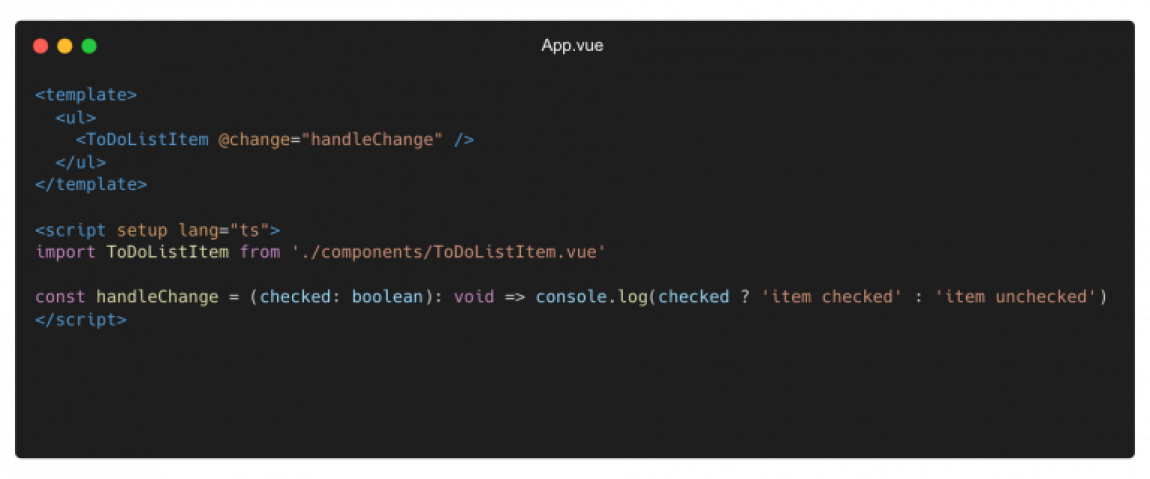
So how do we use this event we have defined? Go to App.vue and update the file to handle the event, like we did with the native event in ToDoListItem.vue:
And if you test in the browser, you should get this:
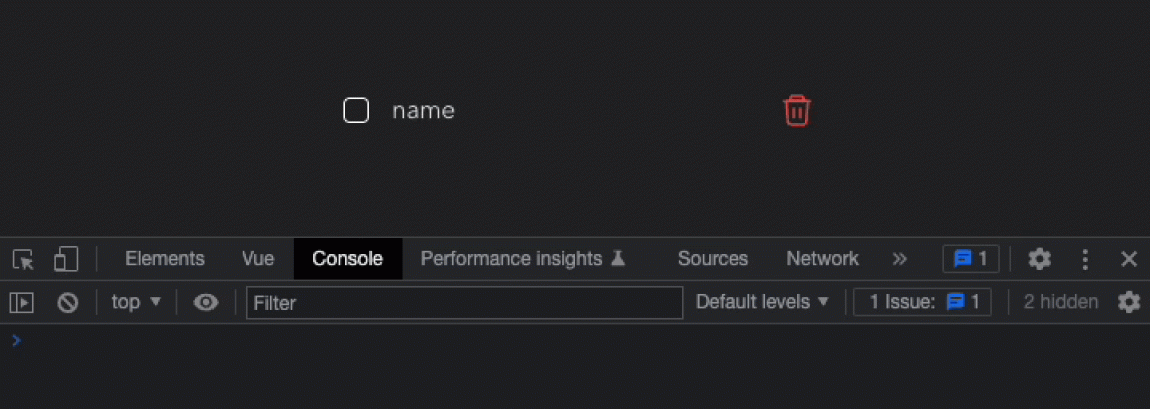
That’s it! A simple component that handles state and emits its own events. The next post will be about creating the entire to-do list, using this component.