Setting up Vue 3 and Typescript using Vite.
December 13, 2022
3 minutes
In this post we will be finding out how to create a new project using Vue 3 and Typescript. To accomplish this we will be using the awesome Vite build tool!
To start, open your terminal in your projects folder and then run npm create vite@latest to scaffold our project with the technologies we want.
Follow the prompts to type your project name and select Vue and Typescript.
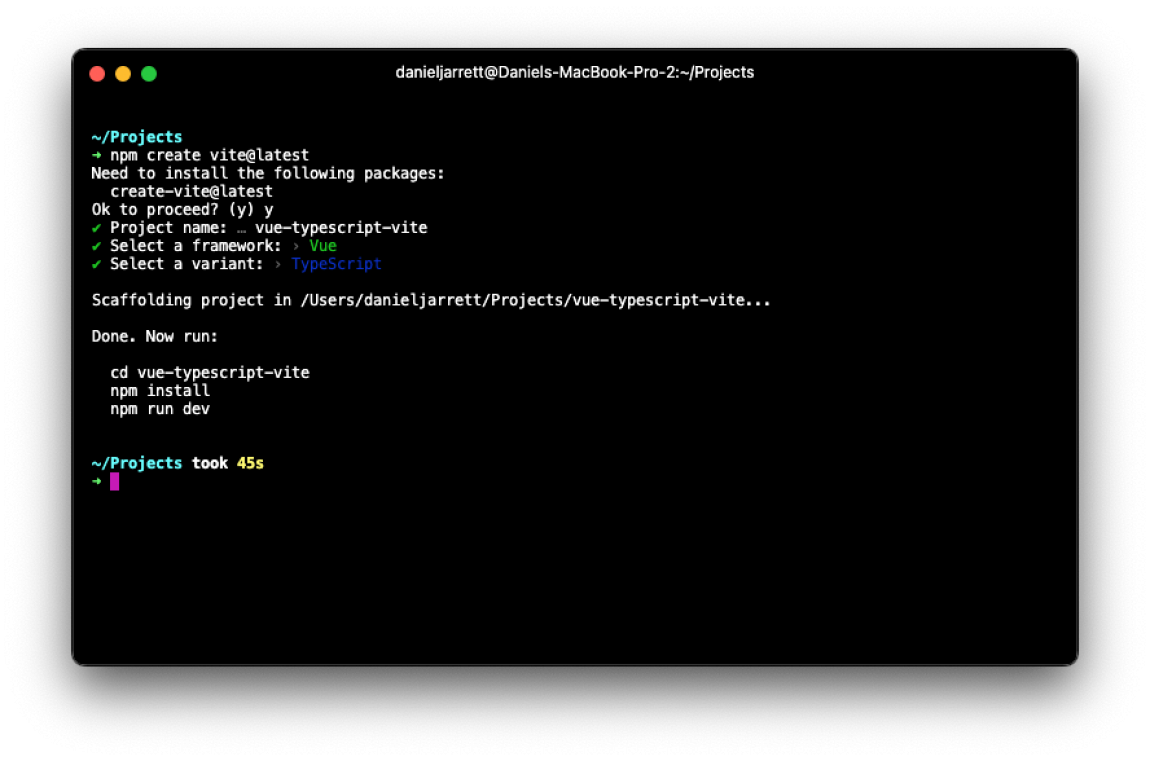
After you have made your selections, you can cd into your project, run npm install and npm run dev once install is complete. If you have completed all the steps correctly you should have the Vite screen in your terminal and be able to load the Local development environment shown:
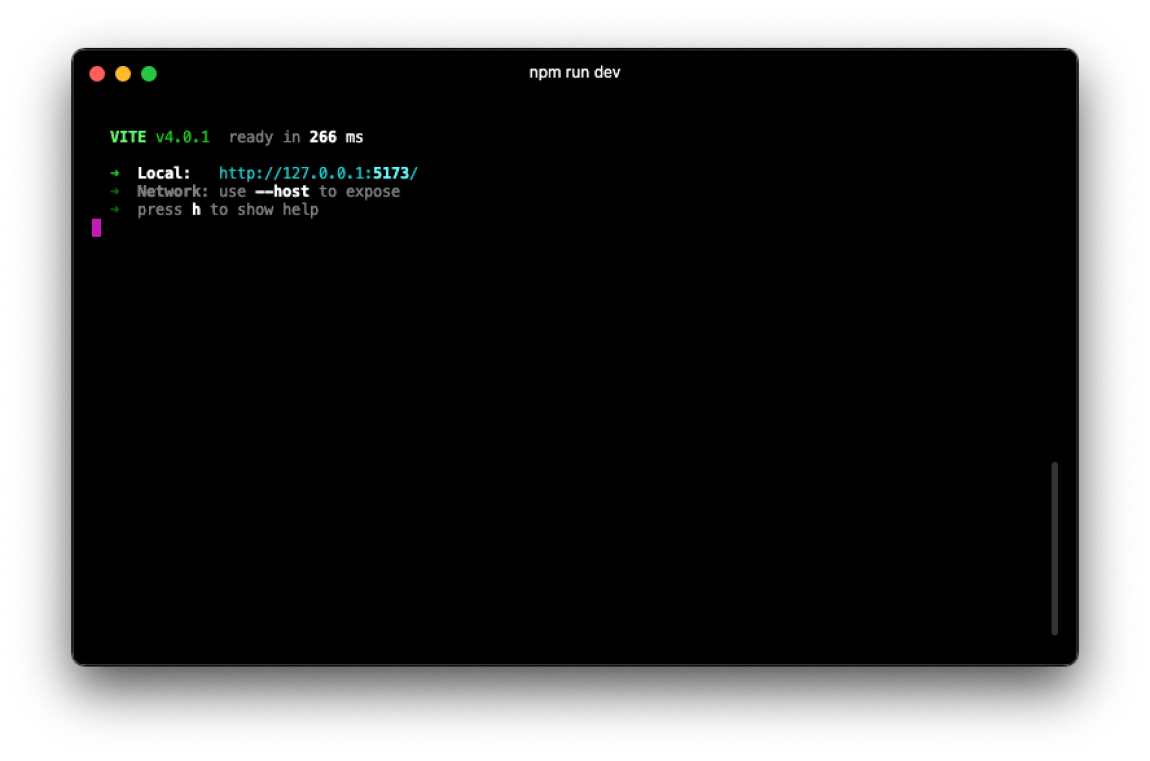

We now have a Vue and Typescript project running off Vite – so quick and simple! We should take a look at some of the code now.
Open up the project in your IDE of choice, and let’s take a look at src/components/HelloWorld.vue, specifically the script area:
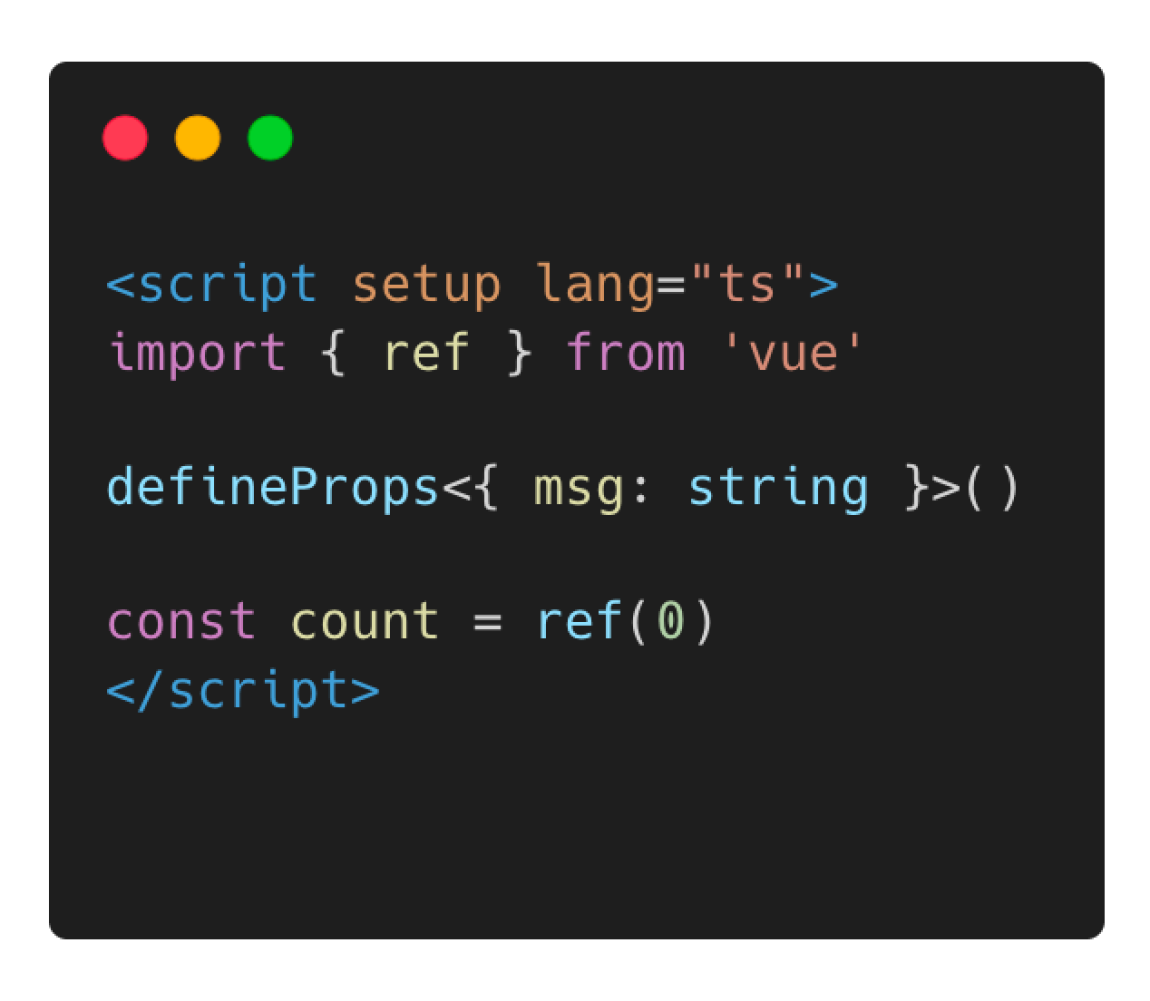
Here we can see some of the new Composition API that is included in Vue 3. This is the way to go when using Vue 3, as it provides a plethora of advantages. For now let’s talk about the different ways to initialise a script tag using Vue 3:
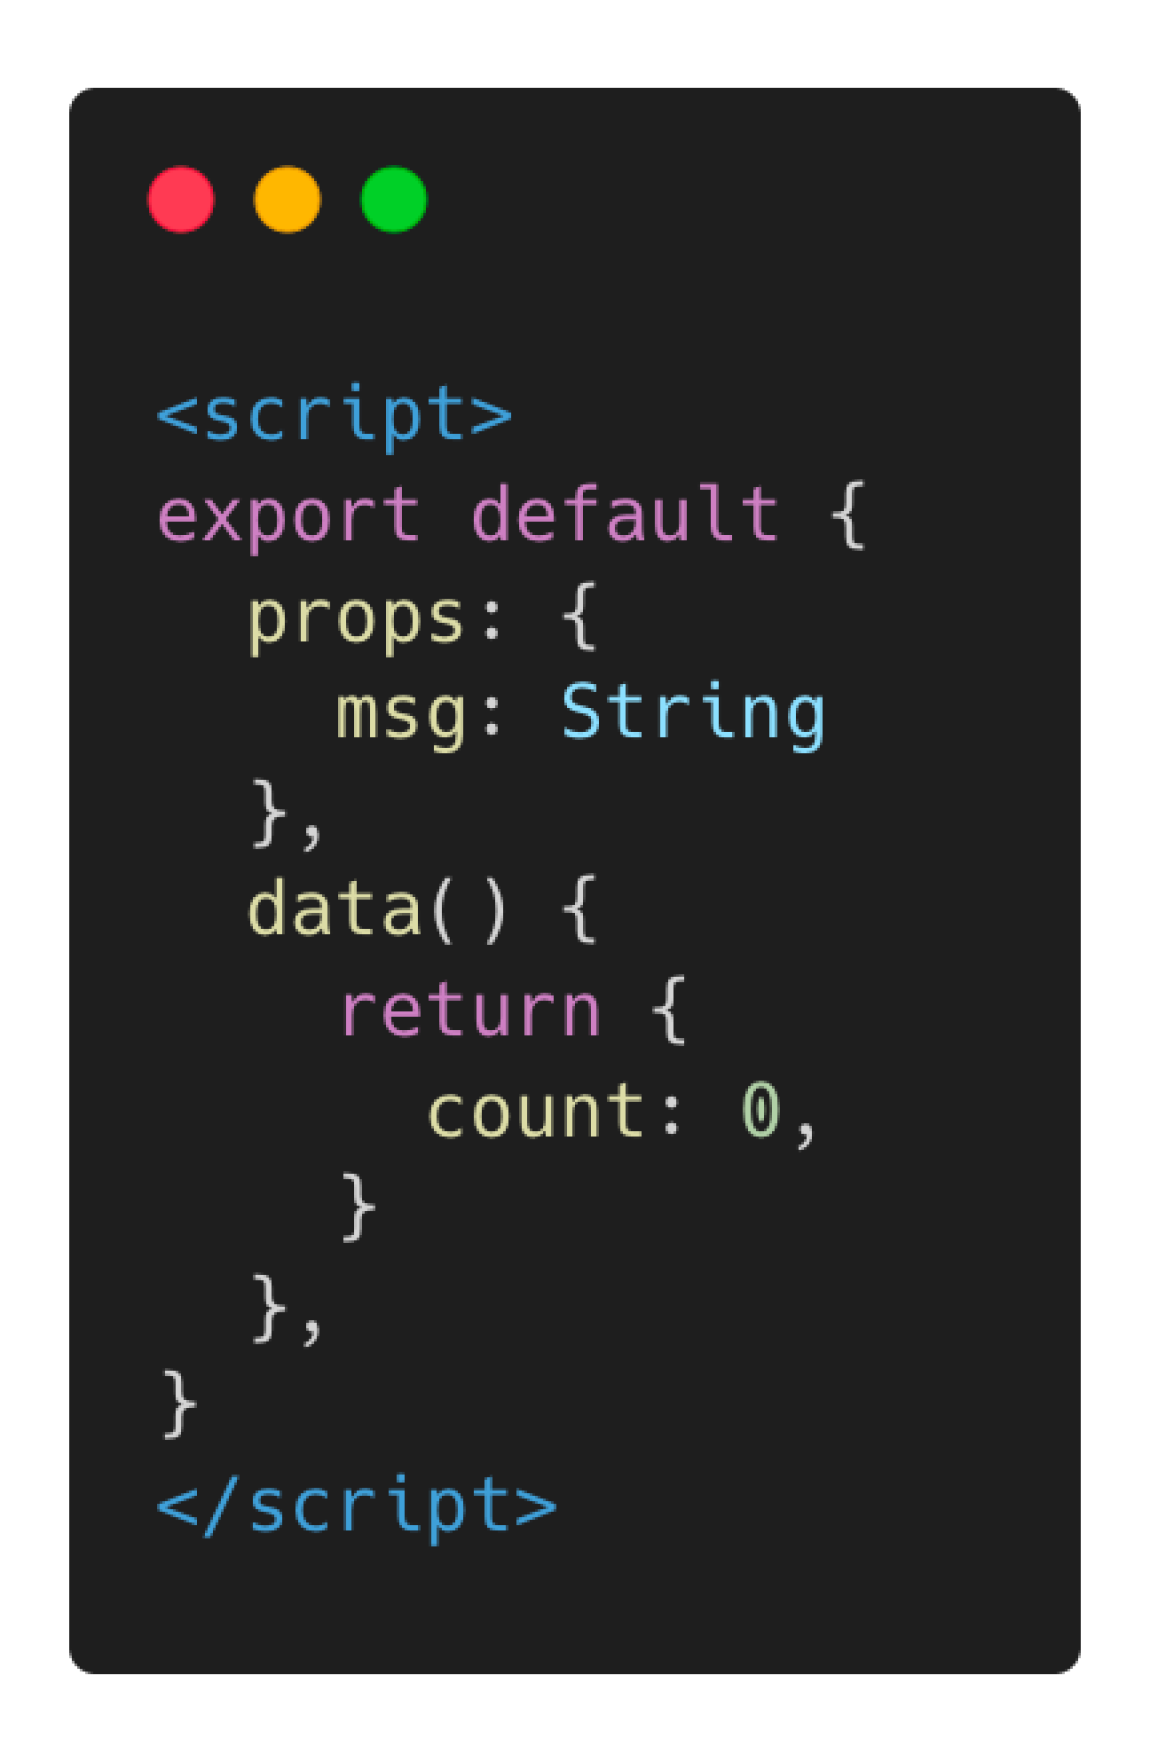
The Options API is likely familiar if you have used Vue prior to version 3. This API provides numerous options within an objects scope, the properties you specify will be available via this within the different function scopes. Whilst this is a nice setup to use, it doesn’t provide nearly as many advantages as the Composition API.
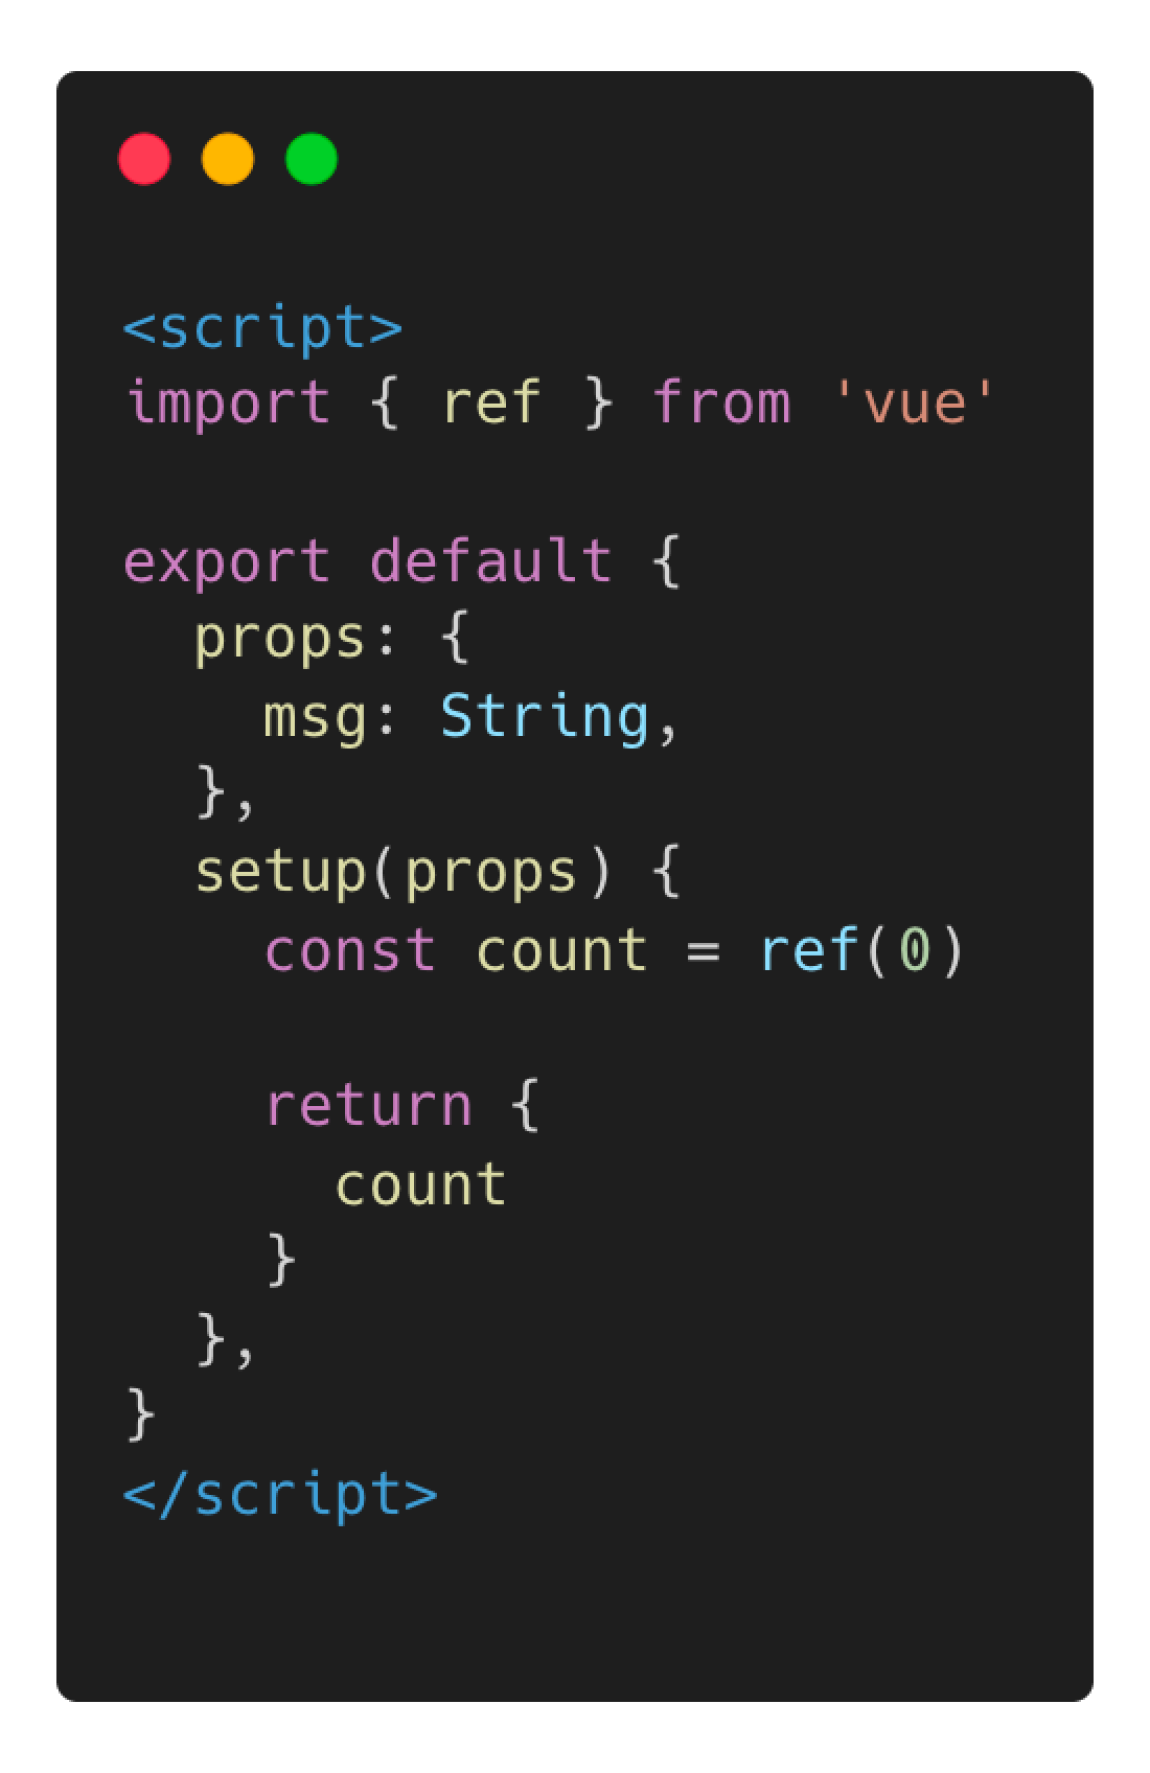
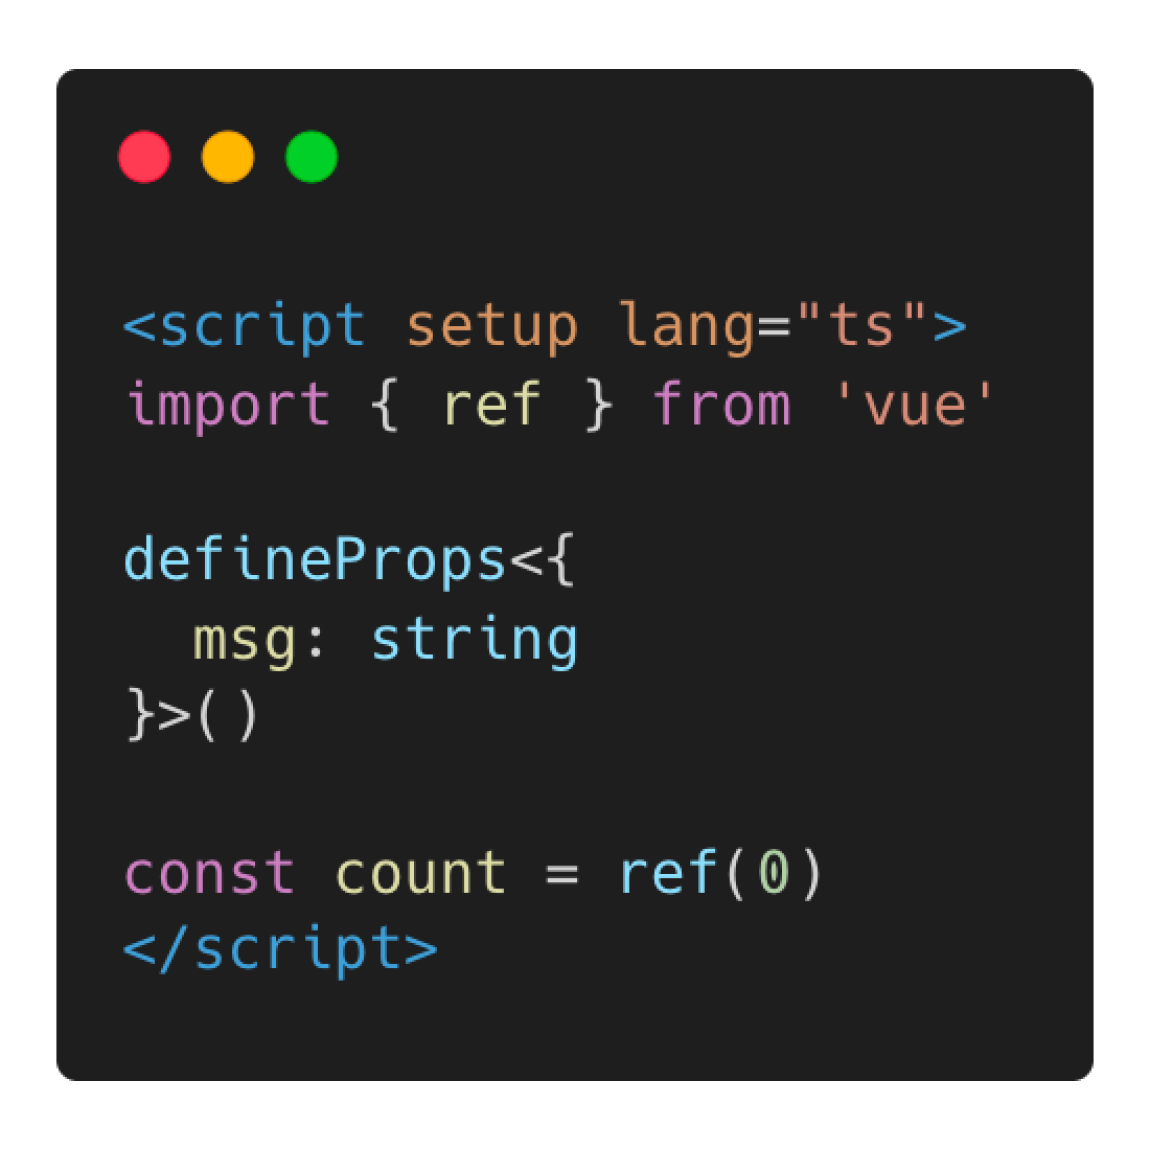
Composition API provides two different ways to setup your scripts. First is via an export object, this has a similar syntax to the Options API which has sections within the export object specific to options like lifecycle hooks or defining props. Whereas the Composition API with the setup attribute provides much more terse code, better Typescript support, better IDE inference and it actually has a better runtime performance! I recommend using script setup.
The next section we will look over the template section of our HelloWorld.vue file:
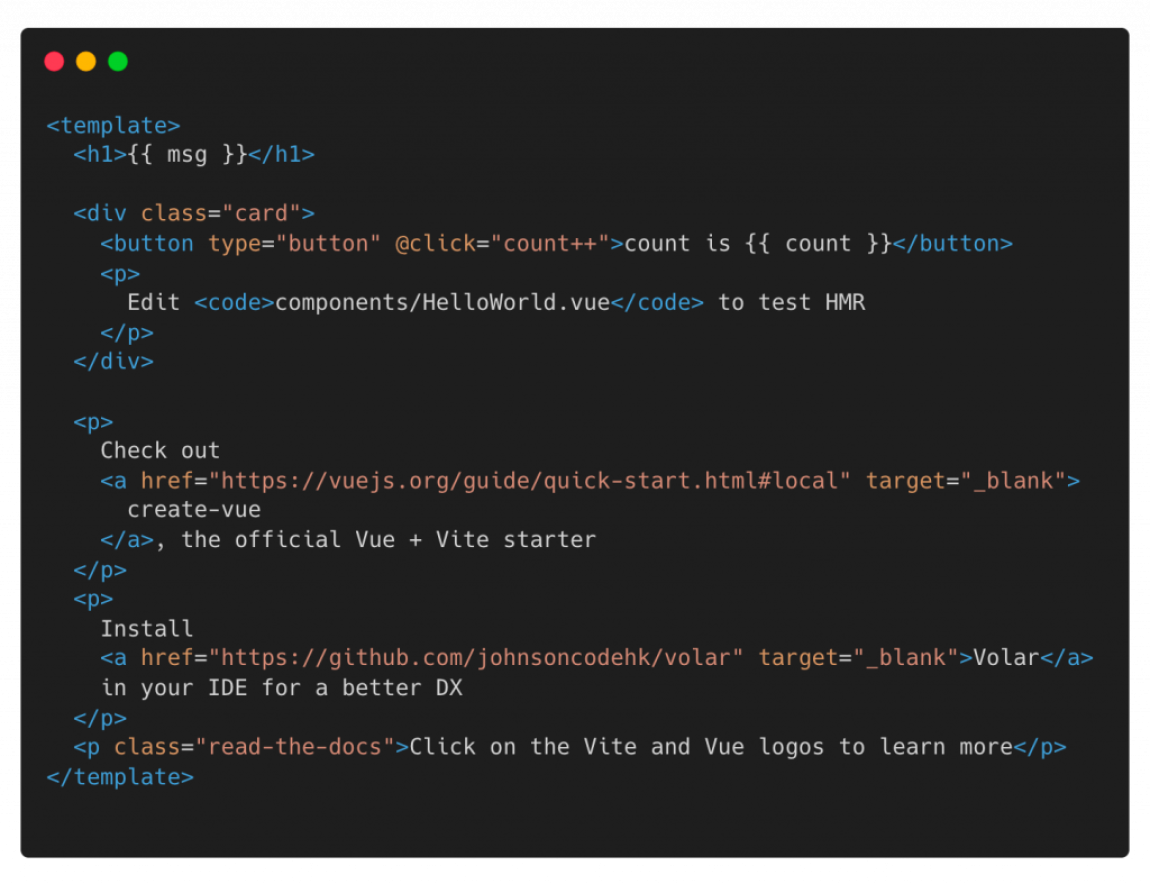
Within the template section of the file, it appears pretty much just like regular HTML syntax. But you can also see a few instances of {{ something }} (double curly bracket) syntax. This is called text interpolation and one of the ways we can bind some of the properties we declare in the script section. As you can see in the image, both msg (the prop) and count (the ref).
Last but not least, let’s look into the style section:
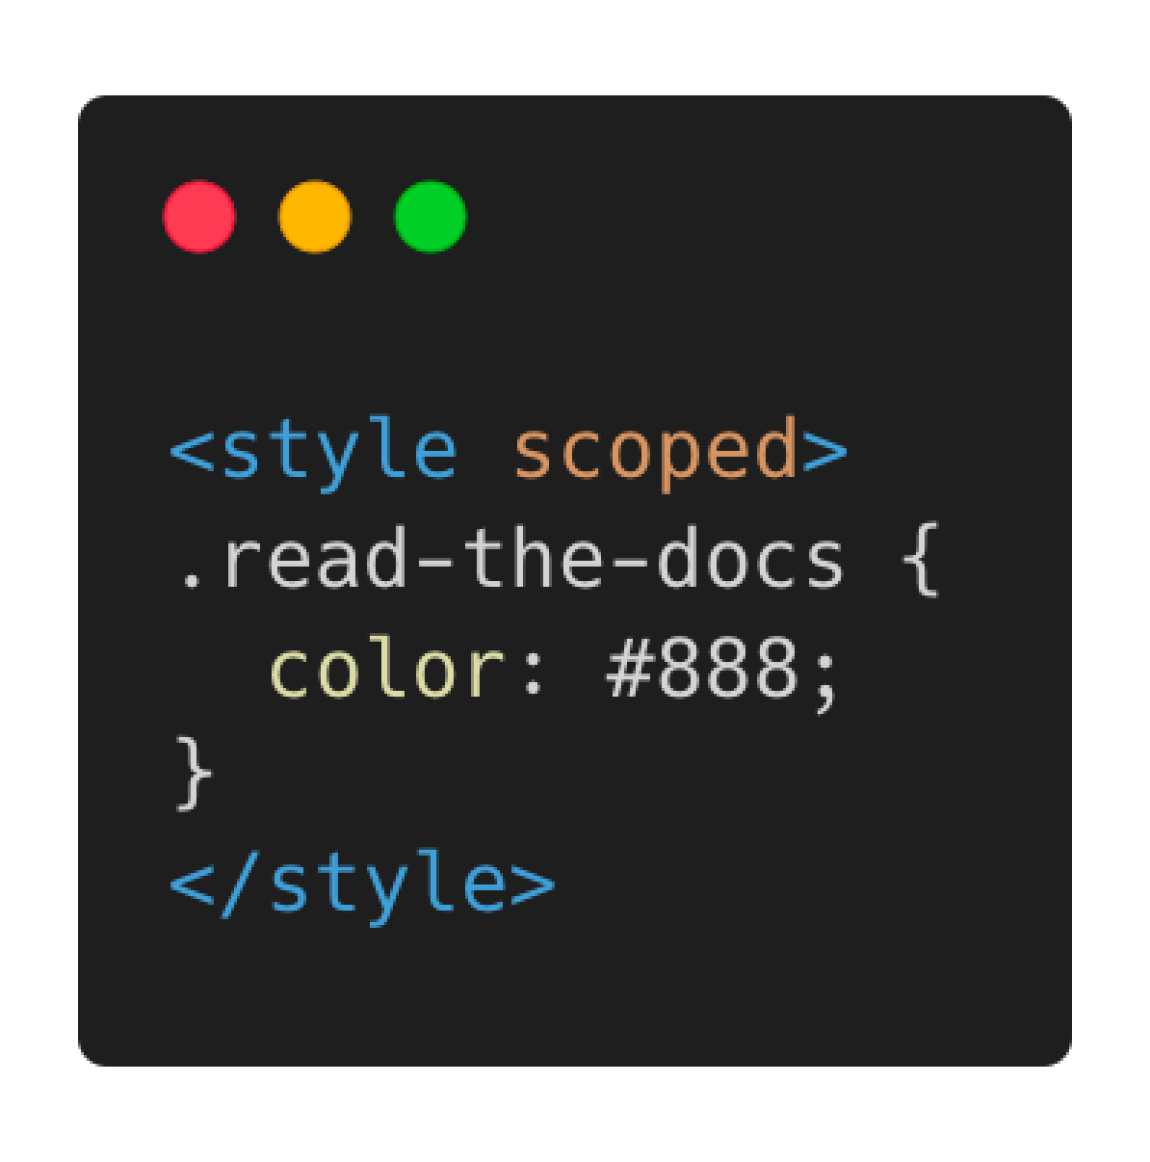
Short and sweet! The style tag works exactly as you might expect it to, with a few extra benefits. The style tag is able to take a few different attributes, one shown in the image is scoped – this ensures all of the styles written within this tag will only be applied to the HTML that has been described in template, neat right? You can also choose a language if you are using preprocessors, for example: lang="scss".
Hopefully you have seen how quickly you can get up and running in Vue 3 using Vite – seconds! In our next post we will create our own component and look in more detail to the properties we can use.
Need help with a Vue Project?
Looking for help with your Vue Project? We’re passionate about creating top-quality web applications that stand out from the crowd. Let our skilled development team work with you to bring your ideas to life! Get in touch today and let’s get started!